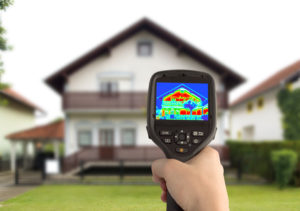
Thermal imaging or infrared, is one of the specialty tools used during a HomeTech inspection. This unique tool has many applications during a home inspection and is included in the inspection price. HomeTech uses this tool on an as needed basis to help in the overall inspection process. In a typical inspection we will run a scan of the interior of the home and certain systems in an attempt to identify any potential issues.

How does Thermal Imaging work?
Thermal imaging finds surface temperatures and can show changes in temperature. If a temperature is different than what’s expected, it’ll show up on the camera. Usually, thermal imaging is used as a preliminary detection tool, but its other tools that indicate leaks, pests, and electrical issues.
The most common tool used for thermal imaging inspection is a FLIR (Forward Looking Infrared) camera, Infrared Camera (IR). This camera can look for water and moisture inside the walls. This is an area an inspector cannot see without opening up the walls or without using this type of technology.
This also makes a home inspection more complete, as an HomeTech inspector can see any problems and investigate further. the FLIR camera serves like a “metal detector” alerting our inspectors to hidden problems below the surface.
Using Thermal Imaging during a Home Inspection
(content below courtesy of Avalon Home Inspections)
Detection of Moisture in the Ceilings and Walls
Thermal imaging is especially useful for detecting the difference between moisture and dry areas. Discrepancies in these areas is often a reason to investigate further. An inspector can have a look inside the walls, floors, and also the ceiling.
Plumbing in a Thermal Imaging Home Inspection

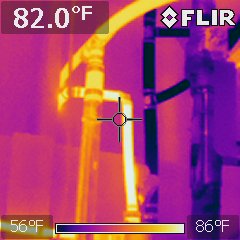
The thermal imaging can scan the plumbing and see where there may be a leak. It allows the inspector to find heat and temperature anomalies and investigate more.
EIFS (Exterior Insulation and Finish Systems) and Stucco Inspections
These inspections are difficult if not almost impossible to do without a thermal imaging camera. For example, rot can be found behind the stucco with a FLIR camera or other thermal imaging device. This would not be possible with the naked eye.
Insects That Are Wood Destroying
Did you know that the infrared camera can pick up active nests? They radiate heat and then the infrared camera captures it. This allows our home inspection team to investigate further.
Electrical Issues
A home inspection that uses thermal imaging can also find the electrical issues in a home. In the picture above, the camera is pointing at the electrical box to see if there are any issues. These would be issues such as circuit breakers that need replacing or overloaded circuits.
The HVAC Unit During a Thermal Imaging Home Inspection
A thermal imaging inspection also looks at the HVAC unit to ensure it is hooked up correctly and functioning properly. If you happen to notice your bill increasing, there could be an insulation issue. It can also find air-conditioner compressor leaks.
Roof Leaks
When an inspector uses a thermal imaging camera in the evenings he can tell that the roof has released its heat and see where there are issues.
Structural Defects
This camera can find wet basements, missing insulation, mold, and other structural defects in the home that can also lead to energy loss.
Energy Loss
Broken seals in double-paned windows or places where the air is escaping on sliding doors can show up too with thermal imaging.
Colors on the Infrared Camera
The infrared camera most common colors are white, red, yellow, and light colors for warmer to hot areas. The blue to black and darker areas are cooler.
The colors represent temperature differentials. Look at the example above, this could be showing a lot of air loss in the attic areas and windows on the front right side. The inspector will have an idea from the outside what might be going on indoors and further, inspection is needed. Additionally, depending on the settings on the camera, the colors may differ.

